I think most of us can agree on the importance of a good brow. I’ve tried several make up products on my eyebrows over the years and finally landed on Anastasia’s Dipbrow applied with their brush. There are many days when I just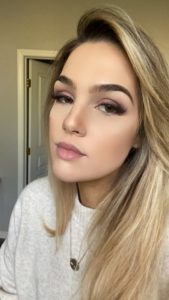 don’t have the time [or desire] to put on my brows, but it always makes me feel more ready for the day when I’m able to flex a strong brow! I had been interested in microblading and other similar techniques, but the thought of someone else PERMANENTLY tattooing eyebrows ON MY FACE totally terrified me.
Anyway, I was checking out at the grocery store a couple of weeks ago and the teller had a beautiful henna design on her hand, which got me thinking… How perfect would it be to use henna on my brows?! You get a bit of a softer look than microblading without the permanent commitment. So I did the next rational thing–Amazon search. I came across this Mina Henna iBrow kit. It got pretty good reviews, and for the $12.95 price tag how much did I have to lose??
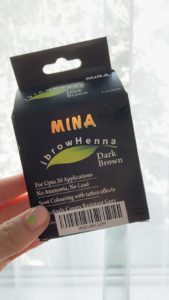 I ended up ordering the Mina Henna iBrow kit in medium brown and dark brown, the eyebrow cleanser and conditioner, and the angled brush that they recommend which I’ll link below. It came with a measuring cup, stirring spoon, dropper, and 3 packs of the henna mix. When it first arrived I did a patch test on my wrist as recommended on the instructions to make sure there’d be no allergic reaction. I waited 48 hours before applying on my eyebrows.
A side note: if you’re trying to decide between the medium brown and the dark brown like I was, here’s the difference in my opinion–the medium brown has more of an ashy brown tone and the dark brown has more of a deep reddish-brown tone. I have done 3 applications of both each time and overall prefer the color of the medium brown (applied x3 to achieve a darker color) for my personal skin and hair color.
I followed the instructions, which were very easy. I also kept gloves on the entire time, had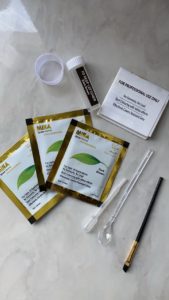 plain water available to clean my brush, kept nearby paper towels to clean up spare product, an eyebrow/lash brush, q-tips and cotton balls to clean up any unwanted product around the brows, and vaseline to protect the skin around the brow from getting stained.
I followed the instructions to prepare the product, cleaned the brow area with the cleansing conditioner, then I applied vaseline around the eyebrow area that I didn’t want to get stained by the henna. I used the angled brush to apply the product to the area on my brow that I did want stained and cleaned up any unwanted product with a q-tip. The product was surprisingly easy to use. It takes closer to 15 minutes to dry/stain so if you mess up on a spot you have time to wipe up and correct before the stain sets in. As I mentioned before, I’ve use the Anastasia dipbrow with an angled brush so I think since it’s the same technique it was easy for me to figure out.
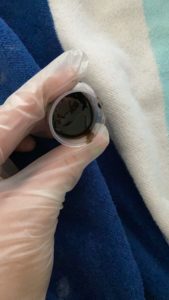 I applied the product liberally, pushed it into the skin with my brush and let it set for 15
 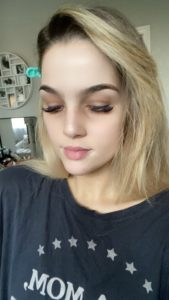 minutes per the instructions. I did this process 3 times to achieve the color I desired. I have done this process a few times now and each time have been very happy with my results.
Before purchasing this product, I watched several youtube videos on how it was done and lots of people would use brow mapping before applying the product. I am very particular about my brows and know exactly how I prefer them to look so didn’t feel this step was necessary for me, but it could be helpful if you’re not sure!
The packaging says it lasts up 6 weeks, but in my experience the stain on the skin lasted closer to a week and a half and the actual eyebrow hairs did remain the henna color for significantly longer. So, I have found myself doing this process every 3-ish weeks. Everyone has different skin and everyone’s skin experiences different elements which can affect the longevity of their henna brows.
Before:
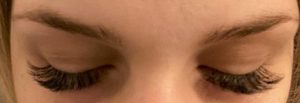
My eyebrows are naturally a lighter brown and even lighter blonde at the inner corners and outer ends.
During:
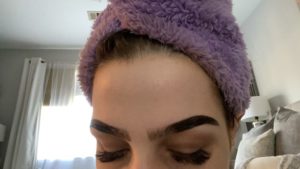
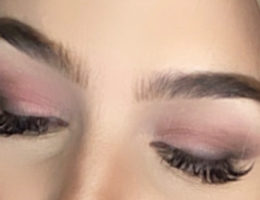
I was a little nervous with how dark they looked while the product was on, as soon as I wiped it off after the 15 minutes I was pleasantly surprised with how soft and natural it looked.
Immediately after 3 applications without make-up:

It does stain the skin temporarily which is nice because it appears to fill in gaps, but it also dyes your eyebrow hairs darker which makes them look fuller for longer.
After with make-up:
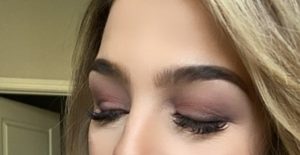 So far, I have nothing negative to say about this product. I have really
 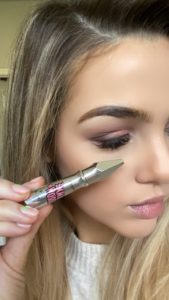 enjoyed how much quicker my brow routine is! I now use this brow thickening gel by Benefit and my brows are completely done for the day.
10/10 WOULD RECOMMEND to this whole process. It took me about an hour the first time I tried it, including the 15 minute processing time x3. Since I’ve done it a few times now, I’ve been able to shorten that time. Another thing I’d like to add about this product is that it doesn’t appear to “chip off” on your skin the way a fake tan might, it just seems to fade on your skin until the stain is no longer visible.
No make up before and after:
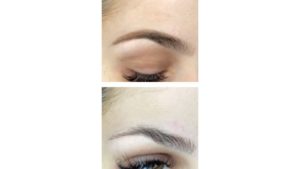
Below I’ll link the products I purchased to achieve this look and a couple of different brow color options. I do receive a small chunk of change if you choose to make a purchase from one of the links below at no extra cost to you, which I will probably use to purchase more fun things on the internet and hopefully create good content for you. Thank you for stopping by! 🙂
